


The InsuraCore footer is a Theme Builder template built mostly with Elementor’s V4 (Atomic) elements, with two classic widgets: WordPress Menu and Social Icons. This guide shows how to open the footer, what each part is, and how to edit it.
Note: The screenshots are for explanatory purposes. Your footer may look slightly different.
1. Open the Footer template
You can open the footer in two ways:
- From the toolbar: go to Toolbar > Edit with Elementor > Footer. The template name may differ.
- From the dashboard: go to Templates > Theme Builder > Footer, then click Edit on the Footer template.
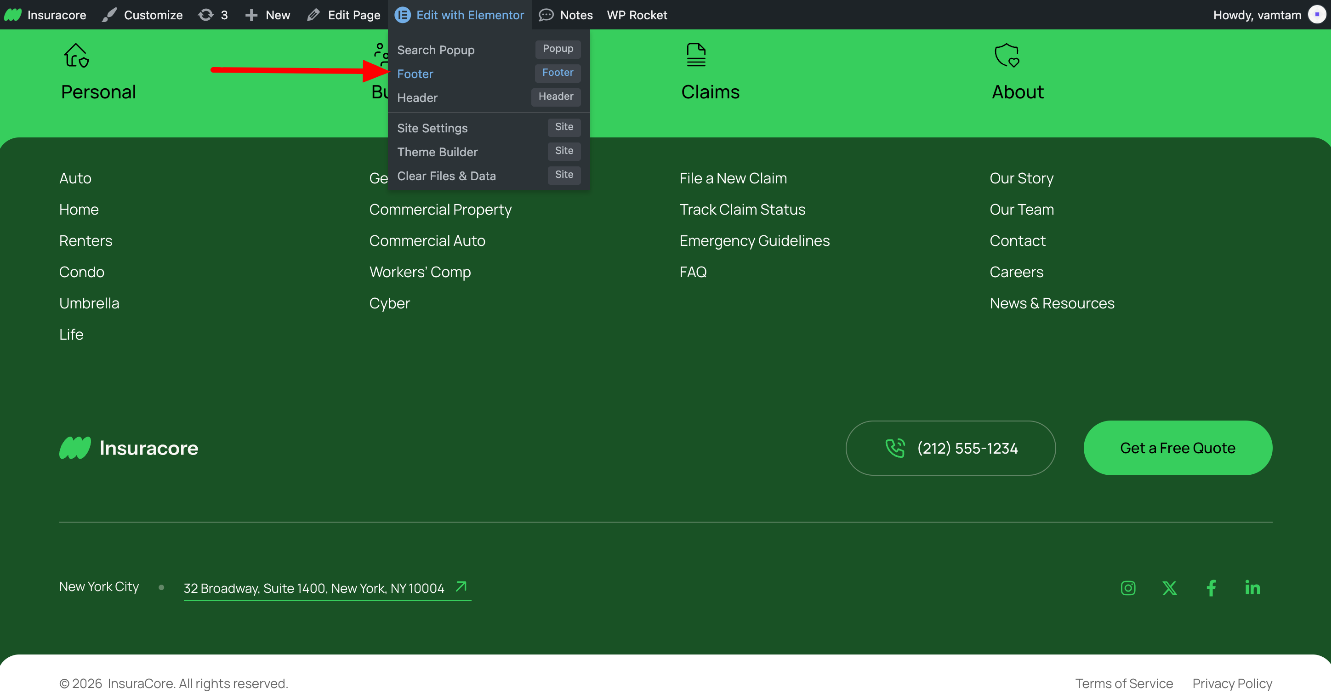
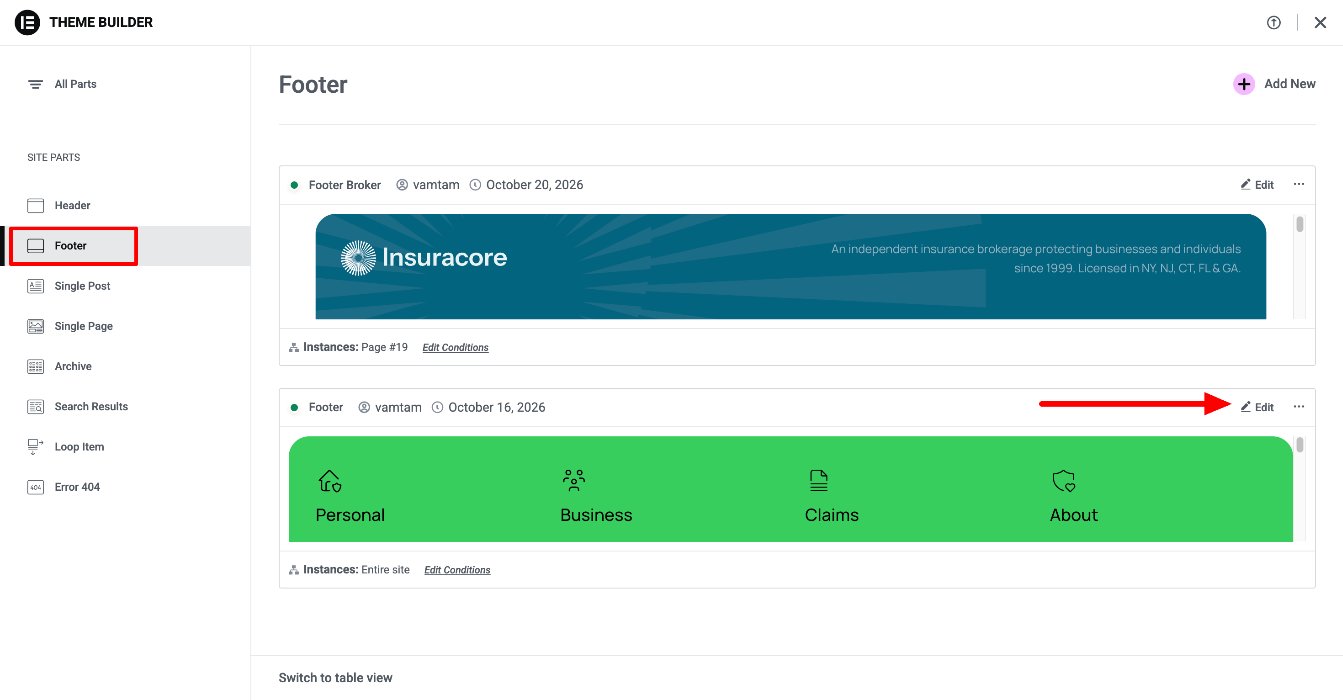
The footer is assigned to the entire site. To check or change where it appears, click the arrow next to the Publish button and select Display Conditions.
Elementor guides: Create or modify your footer · Set conditions for site part templates
2. What’s inside the footer
| Part | Element | Type | Where to edit |
|---|---|---|---|
| Section titles (desktop) | Four linked blocks, each with an SVG icon and a Heading | V4 | Heading text; link on the block |
| Section titles (mobile) | Four “Title - mobile” blocks | V4 | Heading text; link on the block |
| Link lists | WordPress Menu | Classic widget | Appearance > Menus |
| Logo | Image | V4 | Image setting |
| Phone number | “Button with icon” block (SVG + Paragraph) | V4 | Paragraph text; link on the block |
| “Get a Free Quote” button | Button with the button-primary class | V4 | Text and link; look comes from the class |
| City and address | Paragraphs; the address block links to Google Maps | V4 | Paragraph text; link on the block |
| Social icons | Social Icons | Classic widget | Content tab |
| Copyright | Paragraph with a dynamic year | V4 | Dynamic tag settings |
| Terms of Service, Privacy Policy | Paragraphs with links | V4 | Text and link |
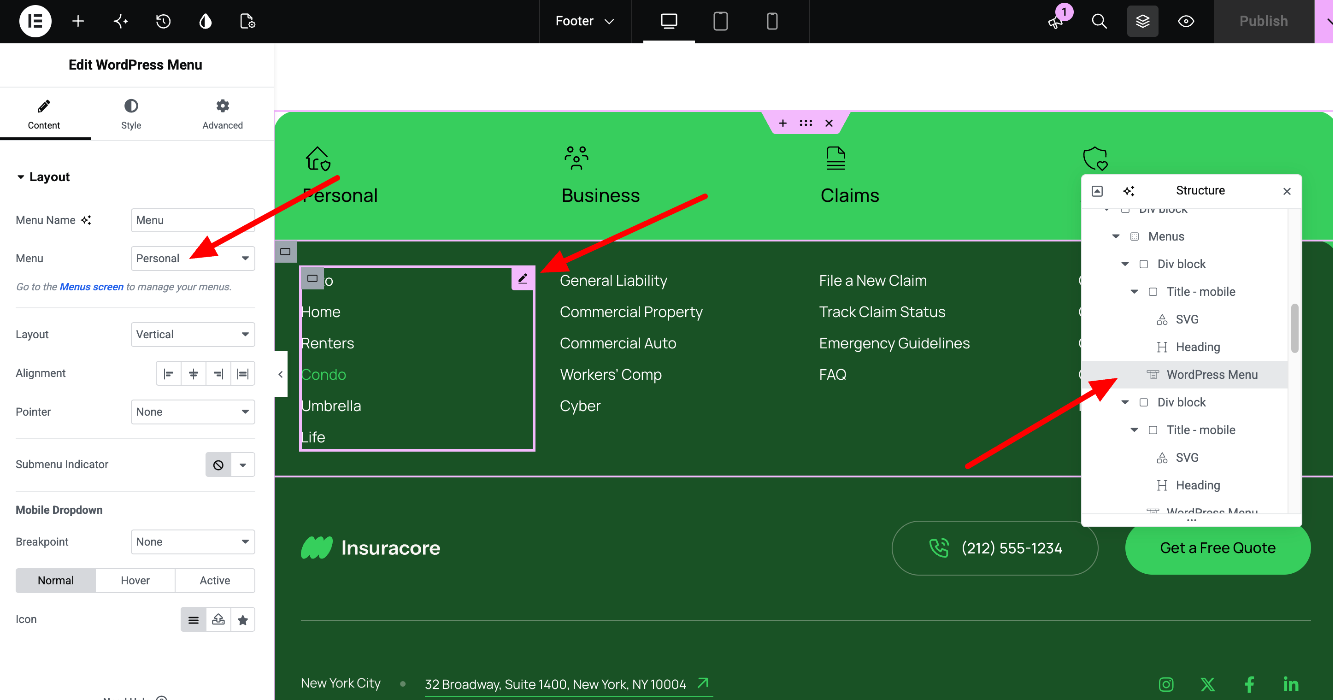
Tip: use the Structure panel to select elements inside the footer. It’s the easiest way to reach small elements and elements that are hidden on the current device.
Read more here: Explore the V4 features
3. Edit the section titles
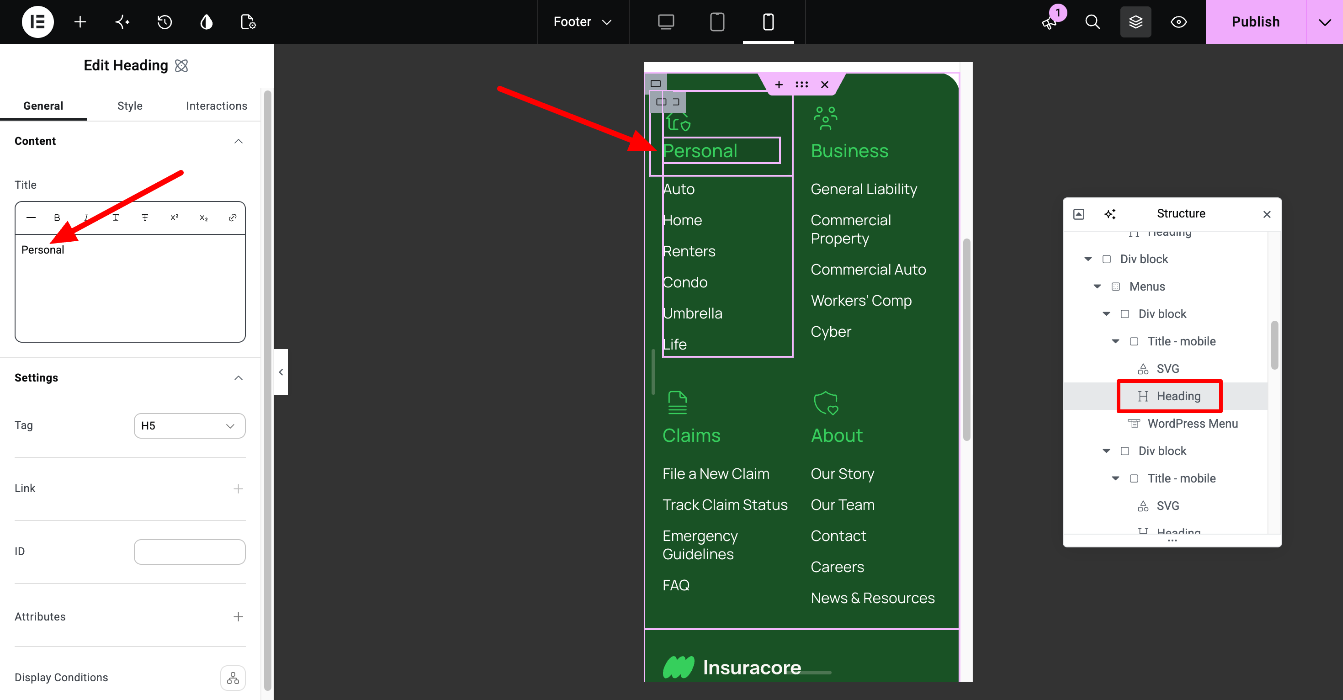
The four section titles (Personal, Business, Claims, About) appear twice in the footer:
- The desktop titles sit in a row above the link lists. This row is hidden on mobile.
- The mobile titles sit directly above each link list. They are shown on mobile only.
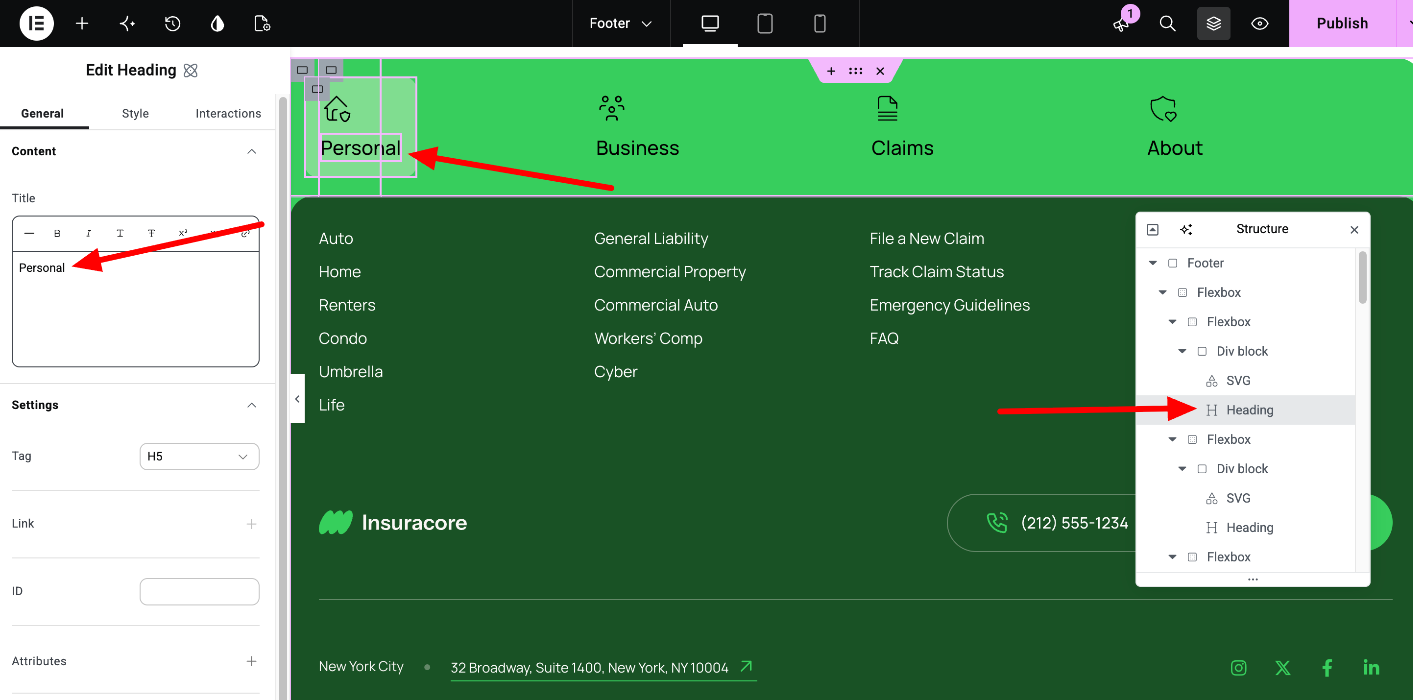
So when you rename a section or change its link, update it in both places. Select the Heading to change the text, and select the block around the icon and heading to change the link.
Read more here: Responsive editing · Show or hide elements per device
4. Edit the link lists
The link lists are regular WordPress menus, so you edit them outside Elementor:
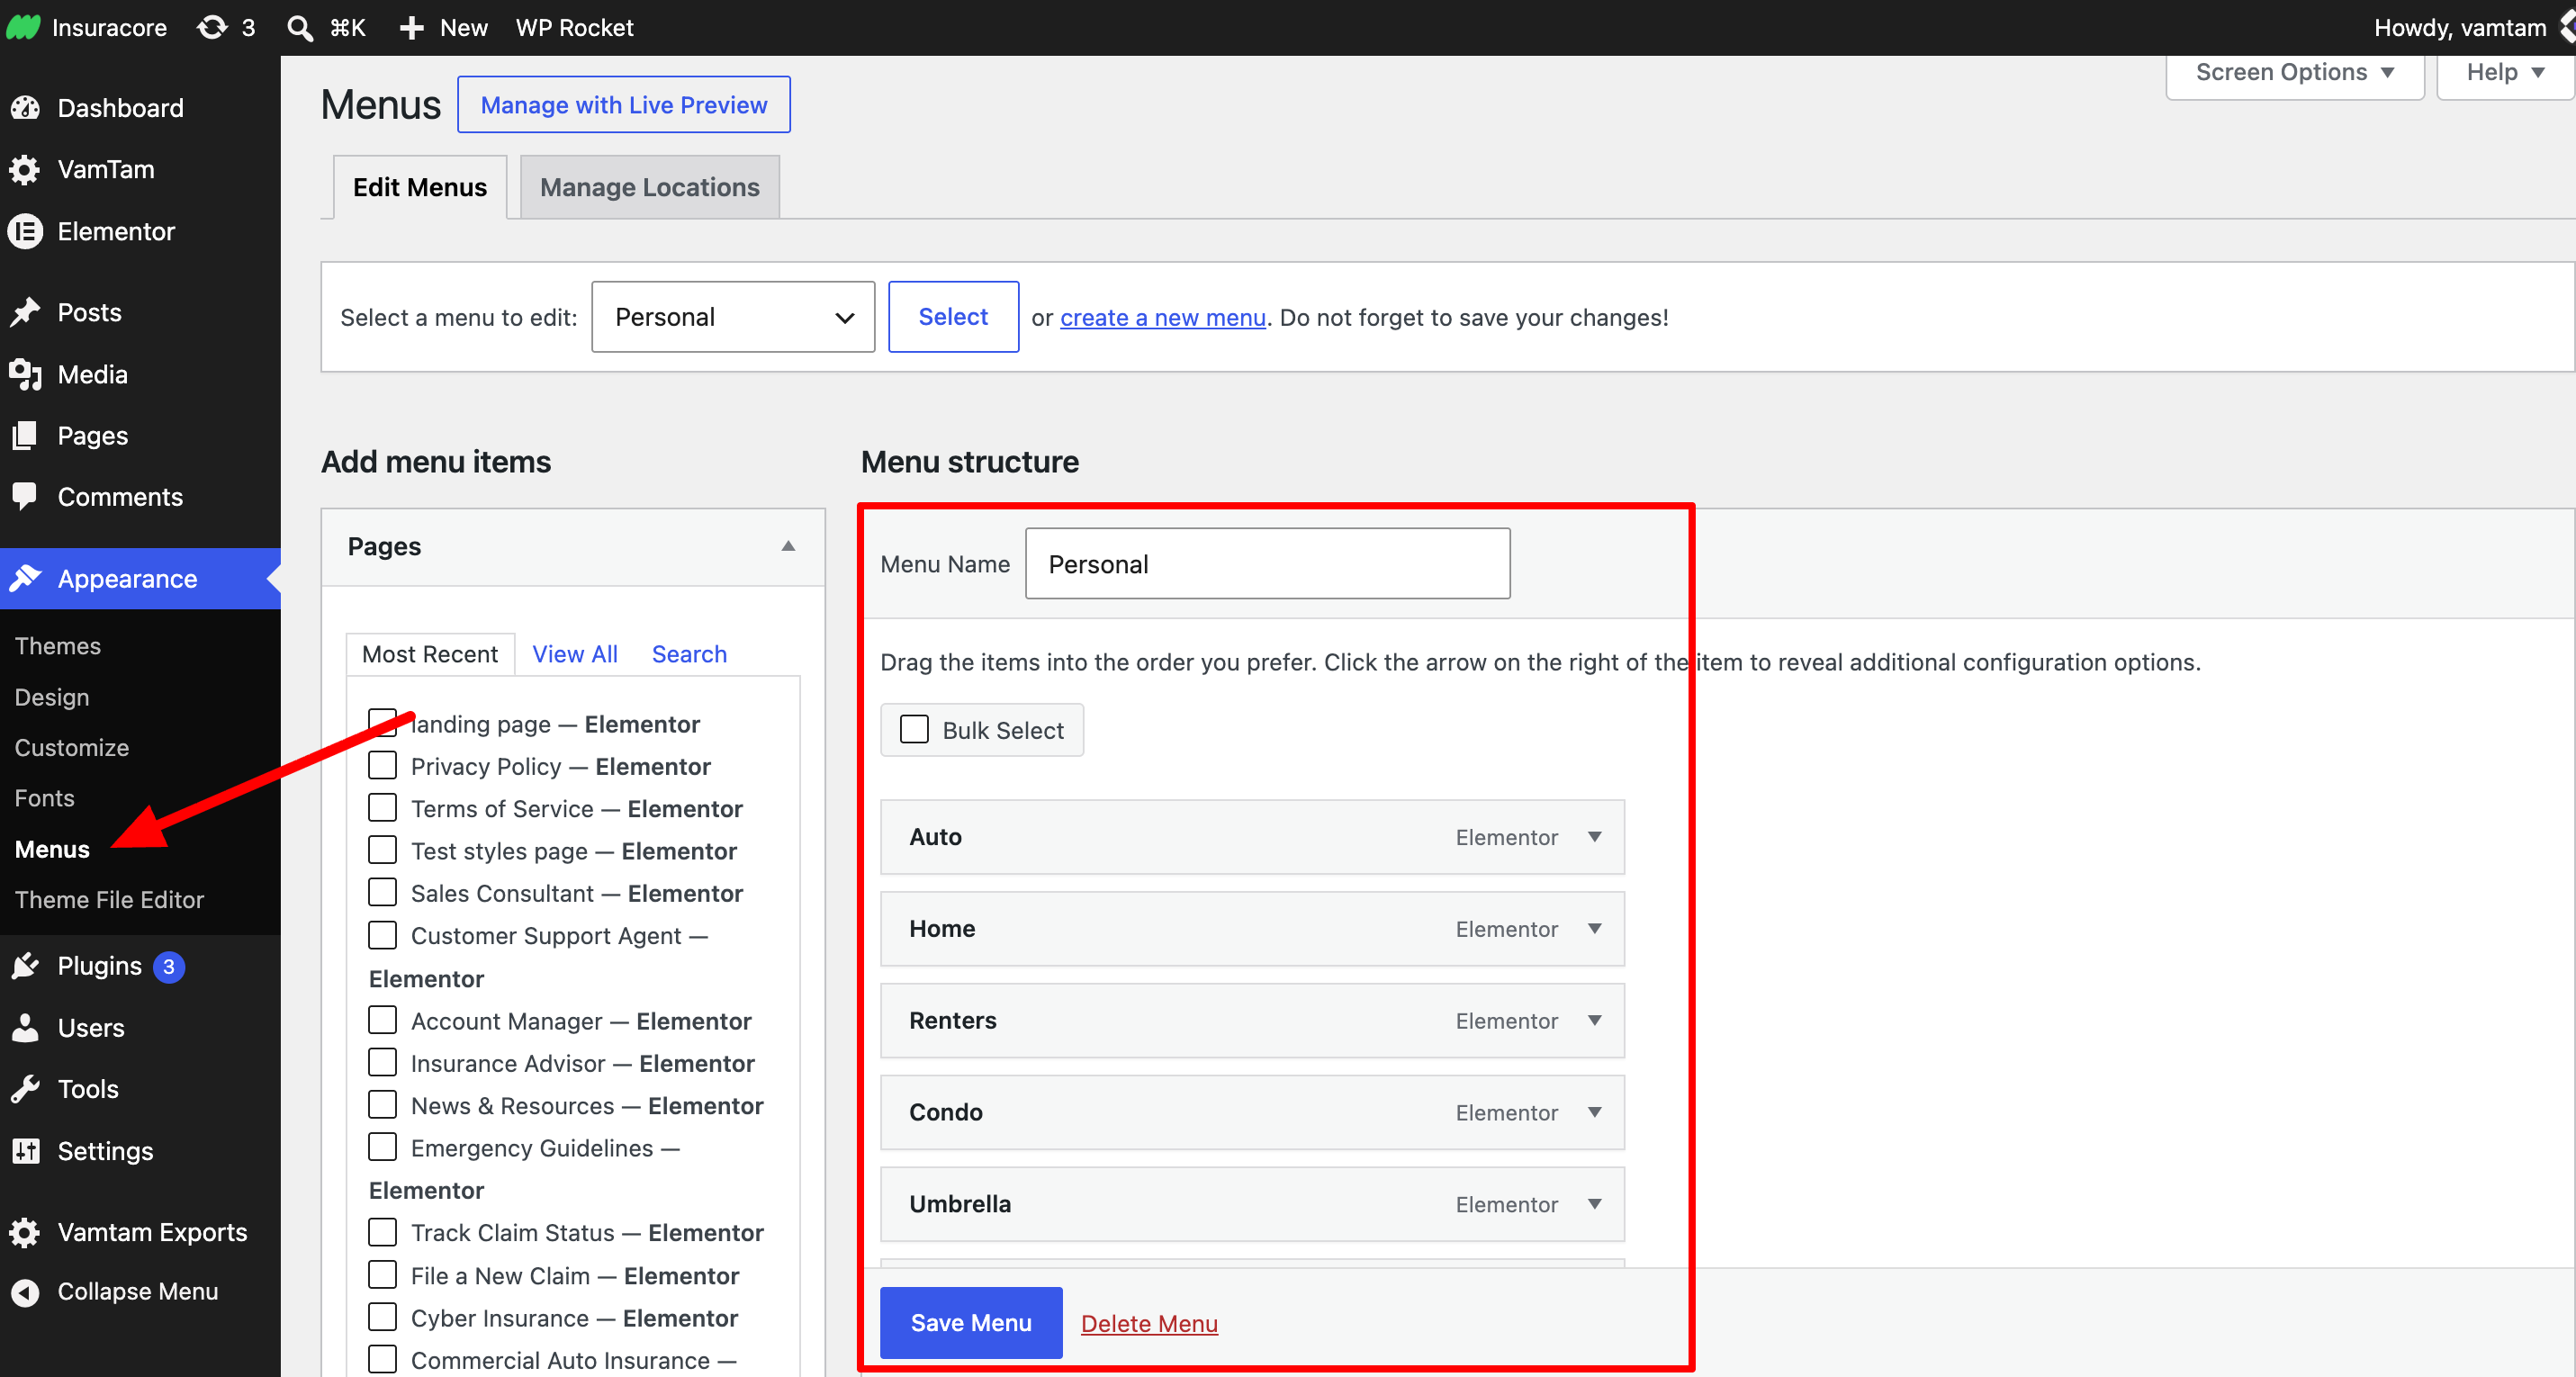
- Go to Appearance > Menus.
- Select the menu you want to edit and click Select.
- Add, remove or reorder links, then click Save Menu.
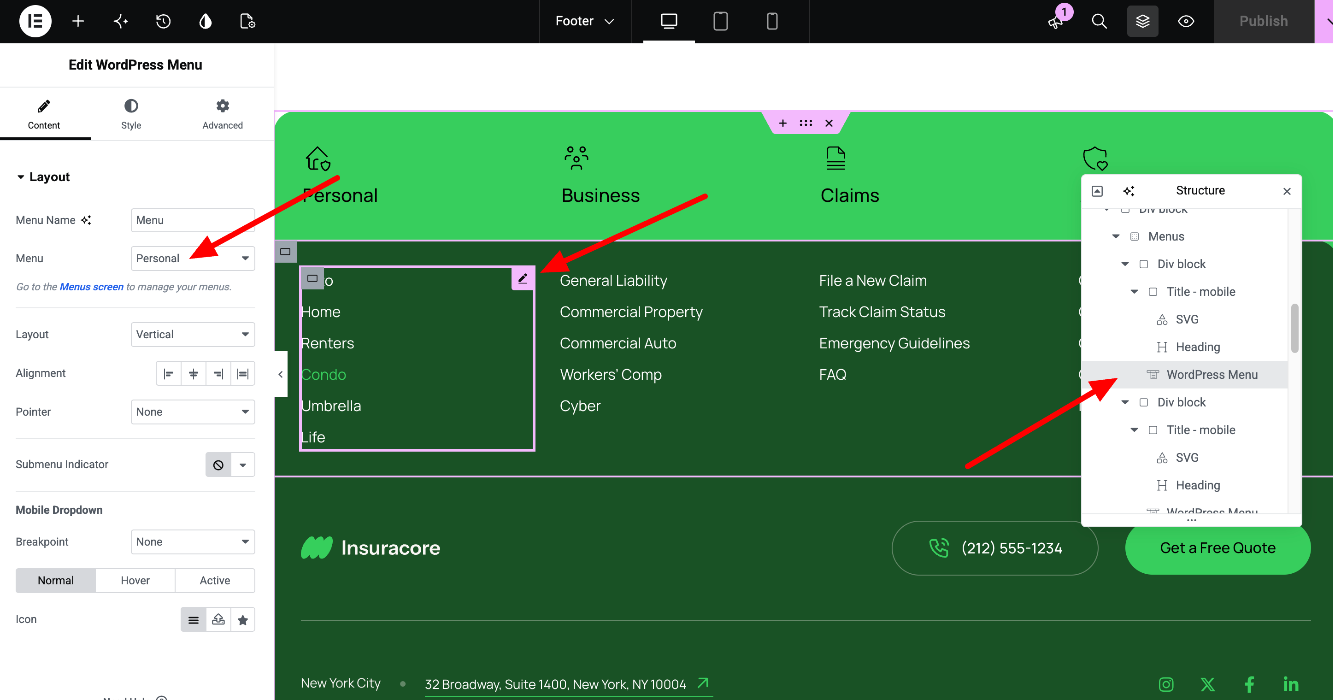
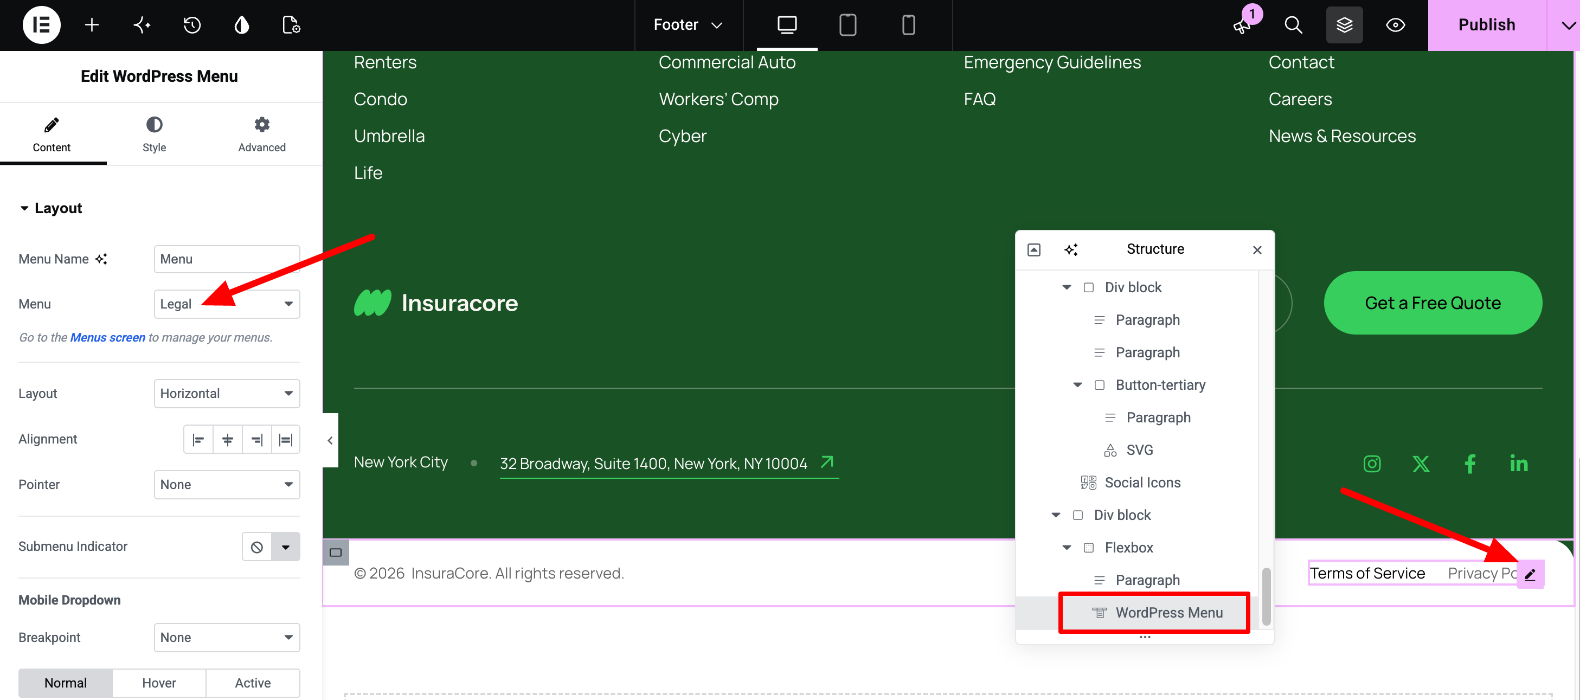
If you’re not sure which menu a column uses, select its WordPress Menu widget in the footer. The Menu field in the widget’s Content tab shows the menu name.
Important: the same menus are also used in the header dropdowns. Any change you make to them updates both the footer and the header. If you want different links in the footer, create a new menu and select it in the footer’s WordPress Menu widget.
Read more here: WordPress Menu widget | Appearance Menus Screen
5. Change the footer logo
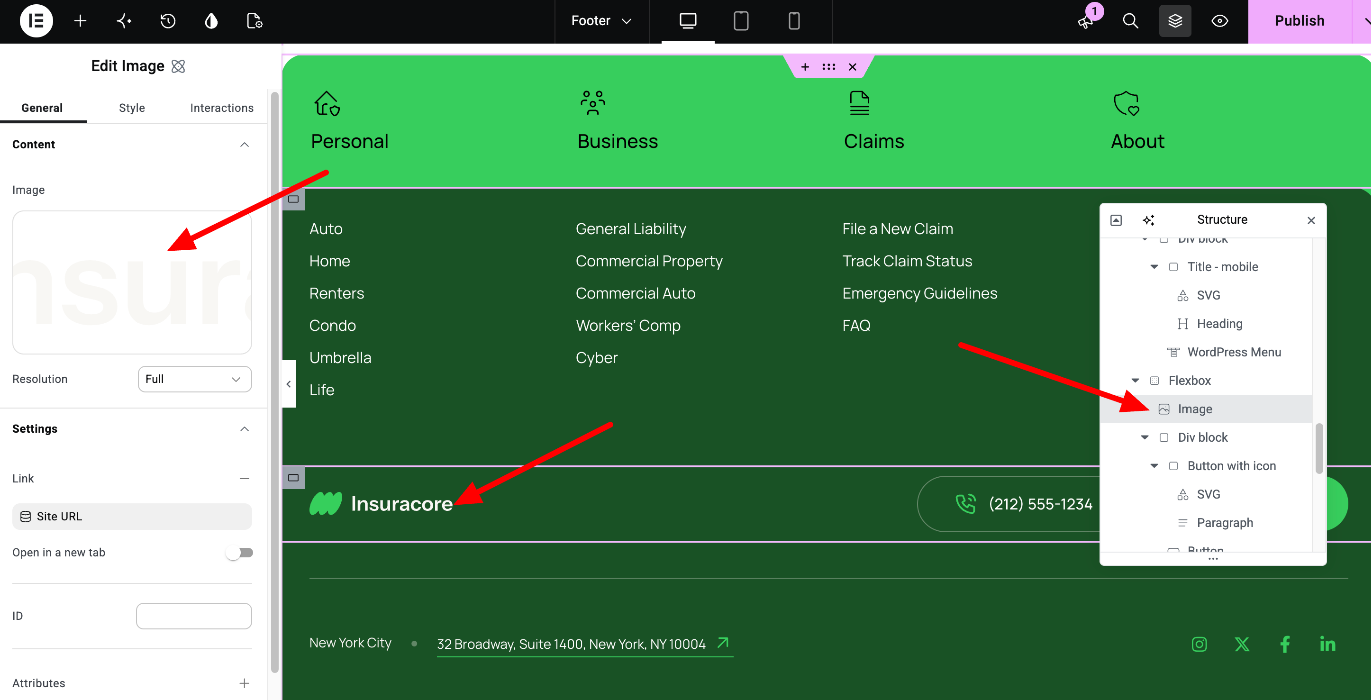
The footer uses a separate light version of the logo. It’s an Image element, not the Site Logo, so changing your logo in Site Settings won’t change it. Select the Image element in the footer and choose a new image.
6. Edit the phone number and the “Get a Free Quote” button
The footer phone number is separate from the one in the header, so update it in both places.
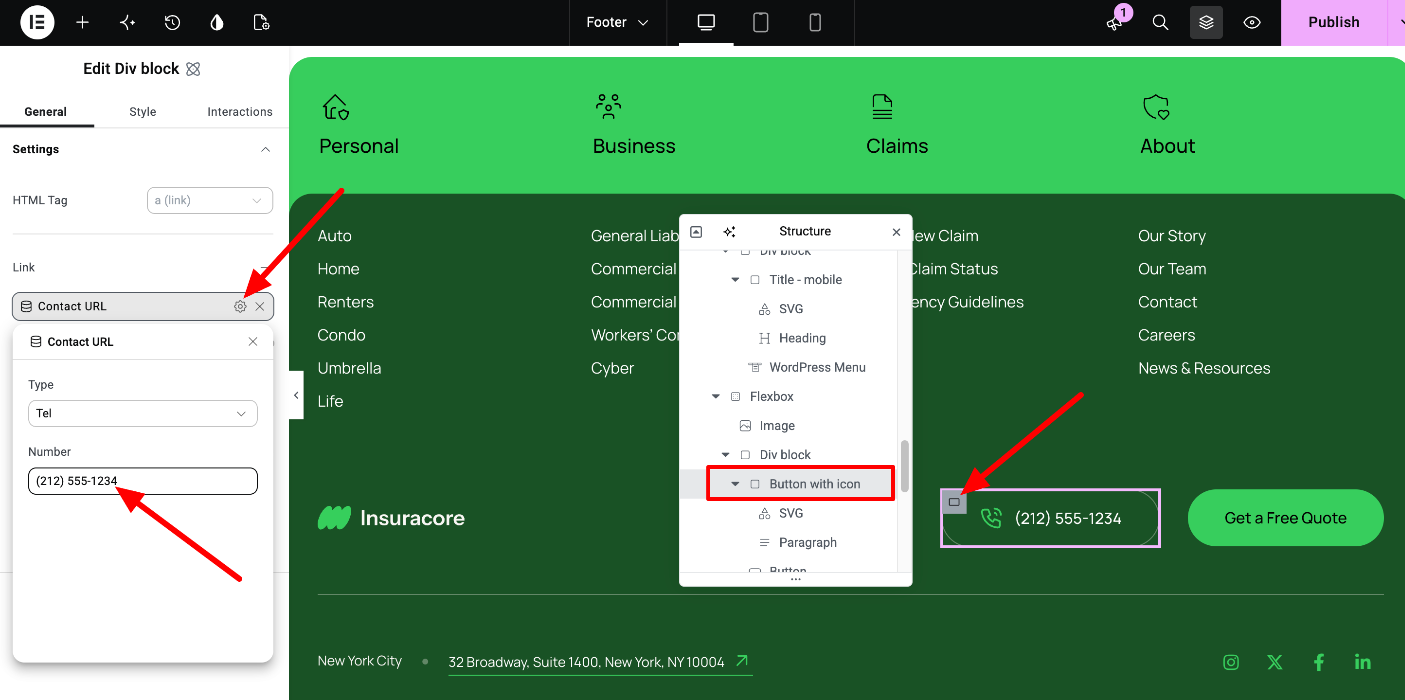
- Select the Paragraph inside the “Button with icon” block and change the number.
- Select the “Button with icon” block itself and update its link. Use the tel: format, for example tel:+12125551234, so visitors on phones can tap to call.
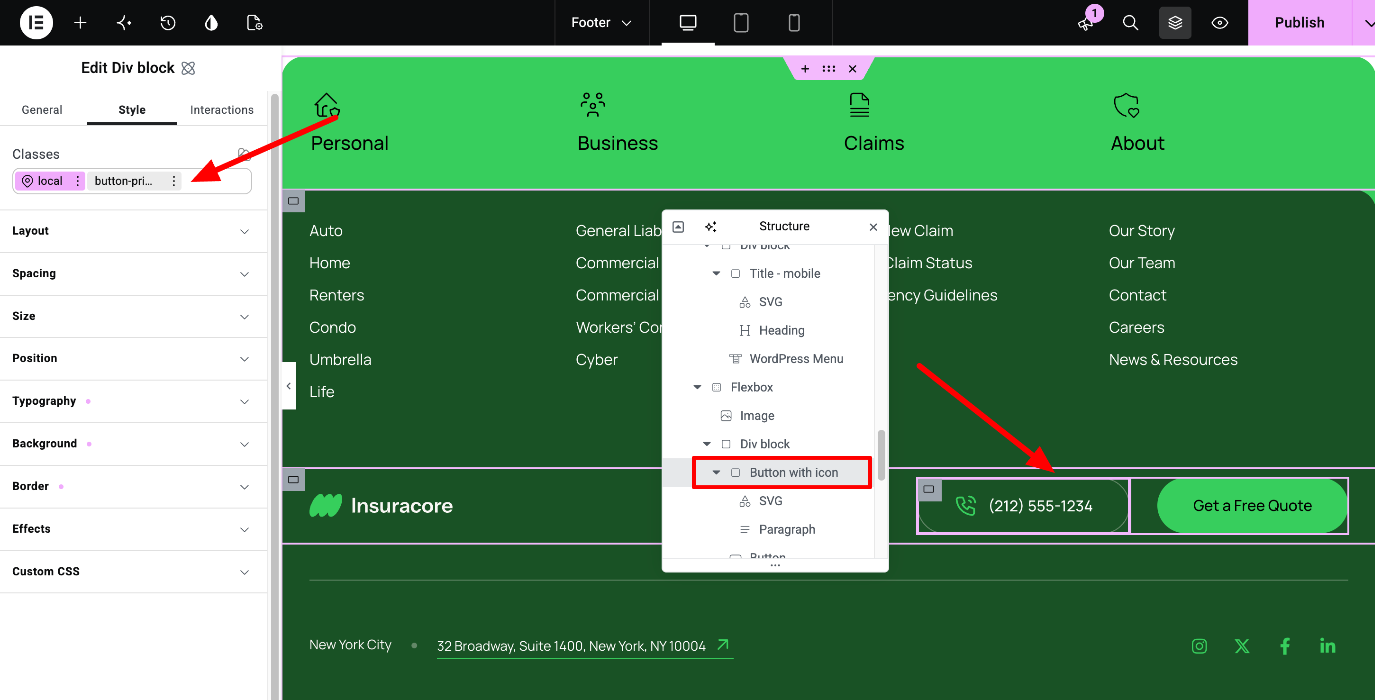
To edit the “Get a Free Quote” button, select it and change its text and link. Its look comes from the button-primary class. If you edit the class, every button that uses it across the site changes. To change only this button, select its local style in the Classes field first.
Read more here: Classes in Elementor
7. Edit the address and social icons
- City: select the “New York City” Paragraph and change the text.
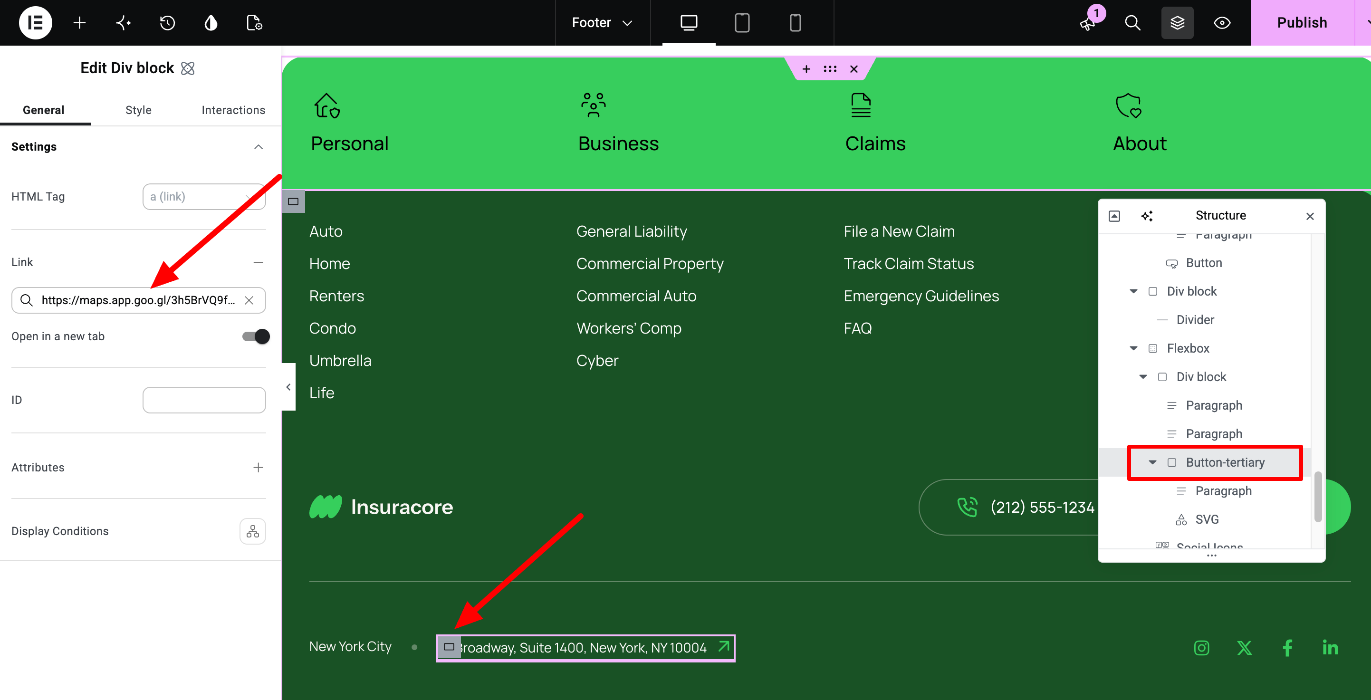
- Address: select the Paragraph inside the address block to change the text. Then select the block itself and paste your own Google Maps link.
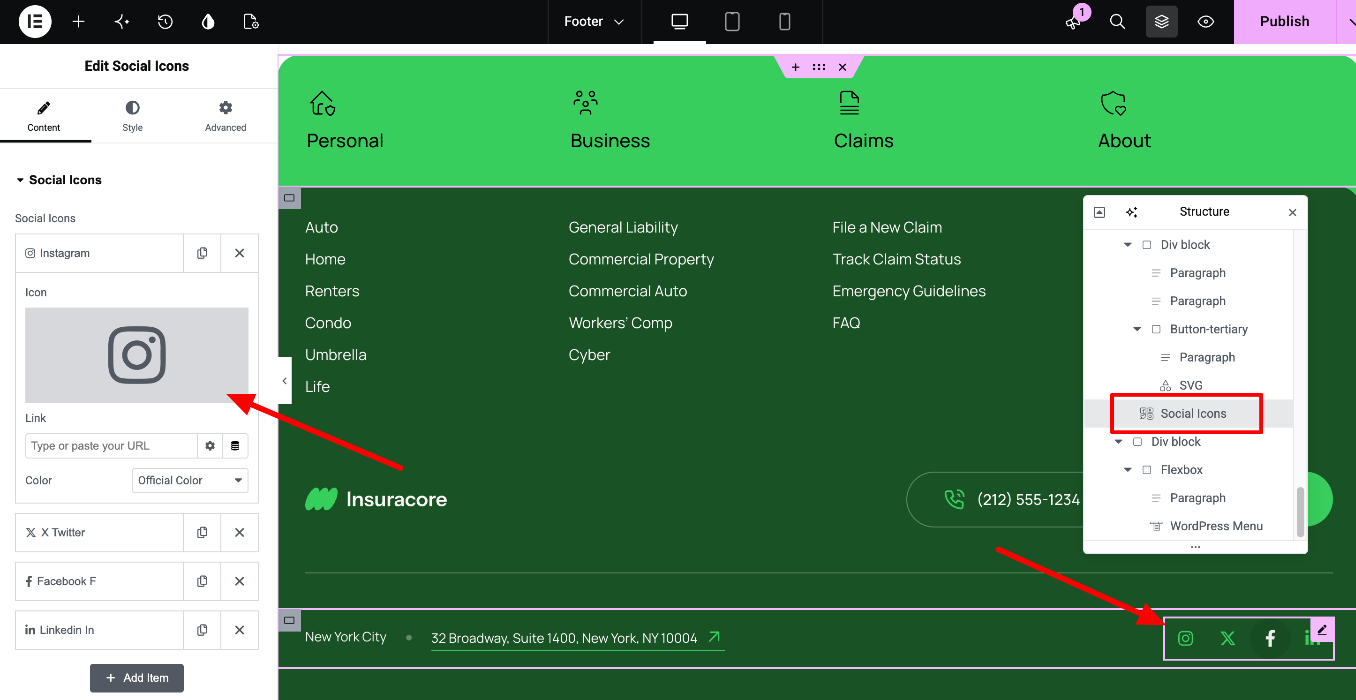
- Social icons: select the Social Icons widget. In its Content tab you can add or remove networks and change each link.
Read more here: Social Icons widget
8. Edit the copyright and legal links
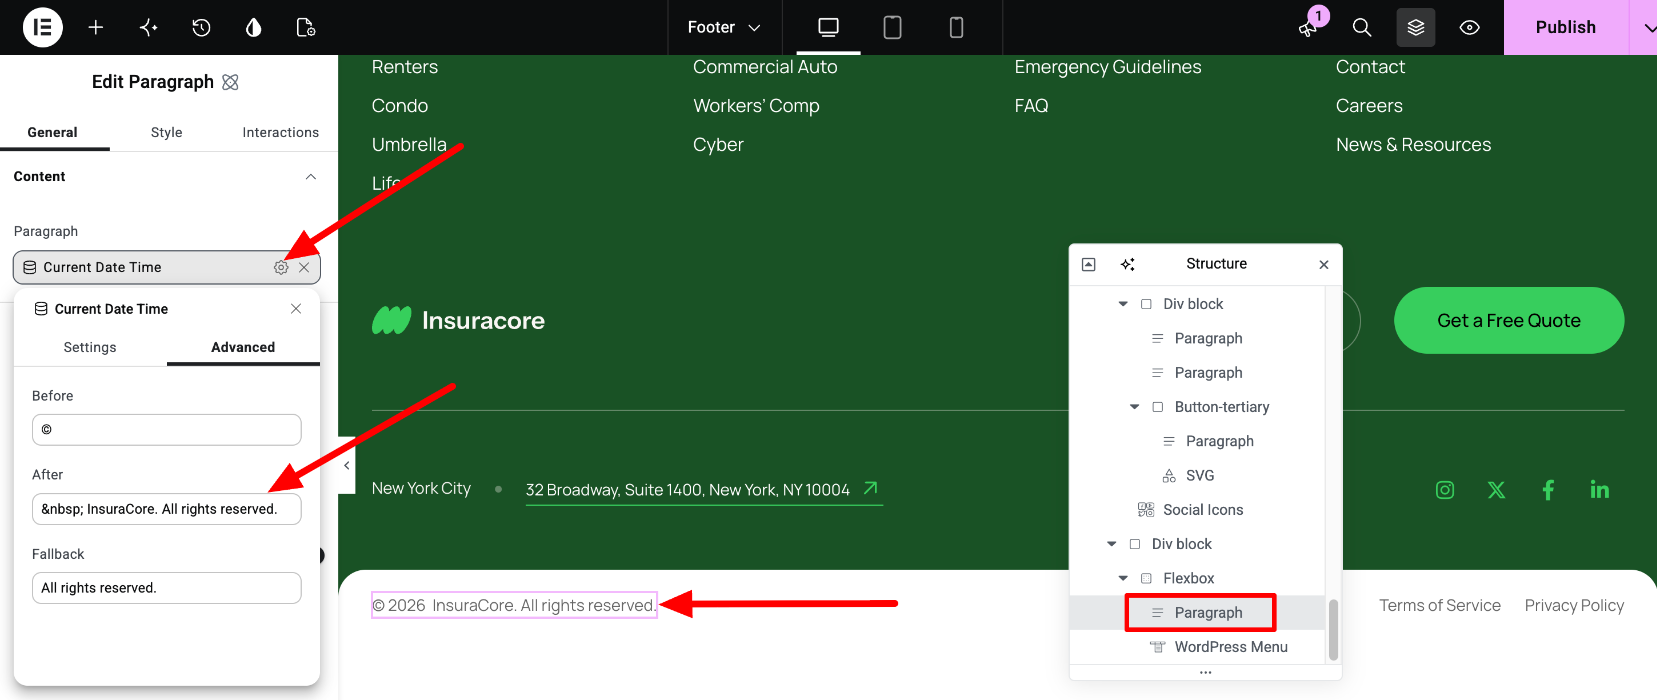
The copyright line uses the Current Date Time dynamic tag, so the year updates automatically. To change the text around the year, select the Paragraph, open the dynamic tag’s settings and edit the Before and After fields.
The Terms of Service and Privacy Policy links point to the sample pages that come with the demo content. Replace the text of these pages with your own, or select each link and point it to your own pages.
Read more here: Dynamic tags in V4
9. The footer on tablet and mobile
Some footer elements show only on certain devices:
- The desktop title row and the dot between the city and the address are hidden on mobile.
- The mobile section titles are shown on mobile only.
- On mobile, the link lists show in two columns instead of four.
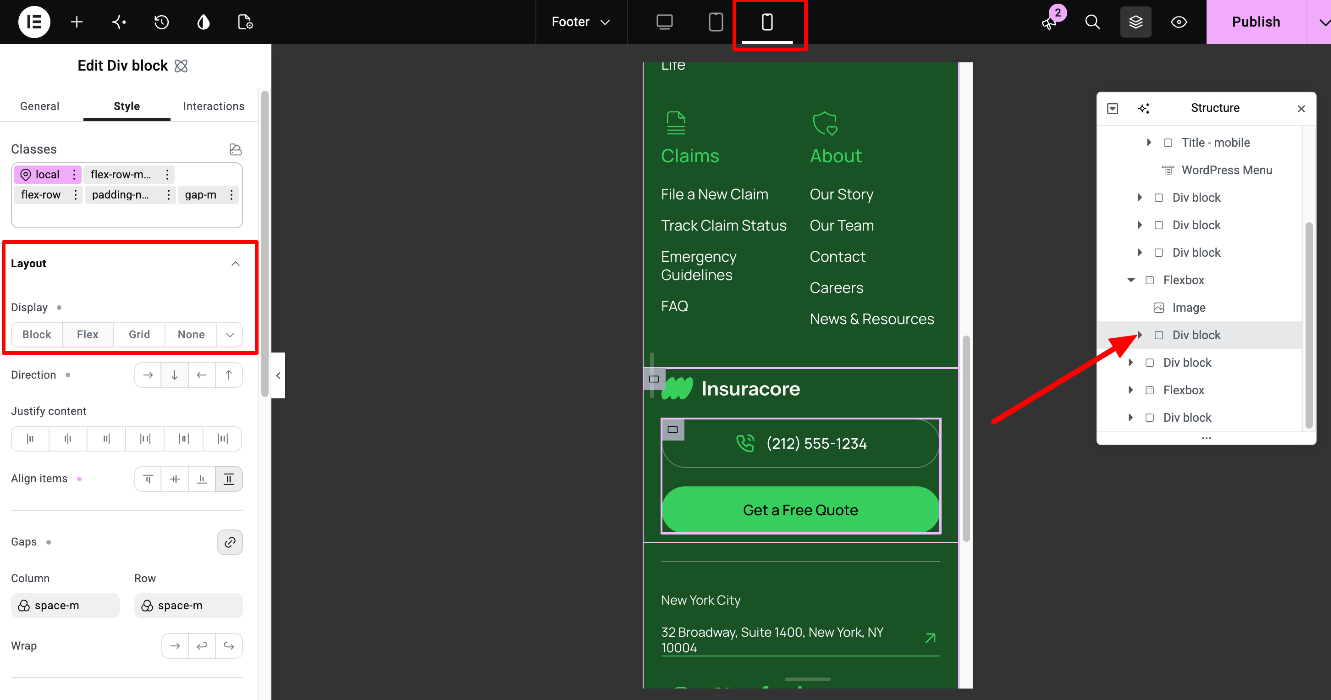
To edit a hidden element, switch to a device view where it’s visible, or select it in the Structure panel. To hide or show an element on a device, switch to that device view, select the element and go to Style > Layout > Display. Choose None to hide it, or Flex or Block to show it.
Switch between Desktop, Tablet and Mobile views with the Responsive Mode icon in the editor’s top bar.
Elementor guides: Responsive editing · Show or hide elements per device
10. The Insurance Broker footer (H2)
InsuraCore includes a second footer, Footer Broker, which is used on the Home - Insurance Broker page. It has a different layout from the main footer:
- Top: the logo, which is an Image element, and a short Paragraph.
- Left: a Heading, the “Get a Free Quote” button and the phone block. To change the number, select the Paragraph inside the “Button with icon” block. To change the tel: link, select the block itself.
- Right: two link columns. Each has a Paragraph title and a WordPress Menu widget. Edit these links in Appearance > Menus.
- Above the bottom line: a row of links (Who we are, Leadership, Careers, Insight, Contact). This is a Menu widget, not a WordPress menu, so you edit these links in the widget itself: select it and go to Content > Menu Items.
- Bottom bar: the copyright Paragraph, a WordPress Menu with the legal links, and Social Icons. The copyright year updates automatically through the Current Date Time dynamic tag.
If you’re not sure which menu a WordPress Menu widget uses, select it and check the Menu field in its Content tab.
Elementor guides: Menu widget · WordPress Menu widget · Social Icons widget
11. Save your changes
Click Publish in the top-right corner of the editor.
Related articles
InsuraCore Elementor Theme: How to edit the Header section?
[Link: Editing Components in VamTam V4 themes - coming soon]